
Tutorshell is a centralized tutor management software offering tutors and private institutes services to manage their tutoring business efficiently and effectively. The software is straightforward to use, but still, we’re here to start from scratch. We will learn the A to Z of using the software.
How to Start Using The Software?
When you start with the software, you need to visit the website: https://tutorshell.com. On the website, one can see the tab named sign in. For joining, you can click on sign in or join free.
Once you click on the tab, you have an option to sign up using your email id. Just enter your email id and password, and you are all good to go. Once you sign in next step is to understand the dashboard and features.
Create Schedule
Once you reach the dashboard, click on schedules to manage the schedule of the particular time. After you click on schedules, you see a calendar where you see three tabs- month, week, or today.
After you click on the month, you see a monthly calendar on your screen. For scheduling a month, you click on the date you want to plan. Once you click, you see an add schedule screen.
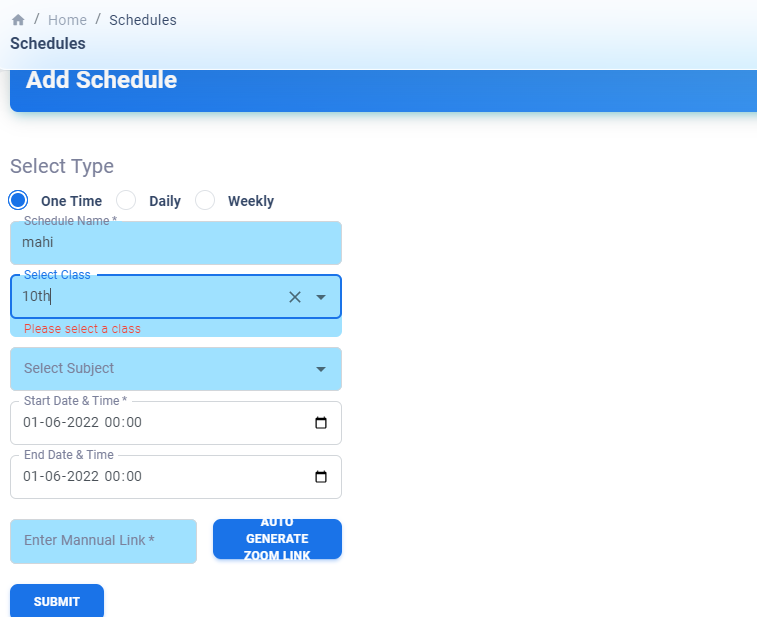
You follow the listed steps to schedule.
- Select a type. For a one-time plan, click on one-time; for a daily plan, click on daily; and for creating a weekly schedule, click on weekly.
- Once you select a type, you enter the name of the schedule.
- After entering the name of the schedule, you write the class on the schedule.
- Enter the subject name. You can also select the subject from the drop-down list.
- Enter the start time and end time of the schedule to define the time duration for the same.
- Once done, you need a zoom link for the schedule. You can enter the zoom link manually or auto-generate the same through the auto-generate tab.
- Click on Submit to Post the information filing.
If you want to plan a week, click on weekly. Once done, you see a screen as shown. As seen, you can enter the weekly plan along with the time and date in the fill-in section. Once you click on the particular box to schedule, you to see a screen similar to the one explained earlier, and there you can enter the details to proceed further.

Add Classes
Through the class feature, the tutor can create a class and maintain a record of the existing class seamlessly. Classes option has seemed to simplify the process of class management.
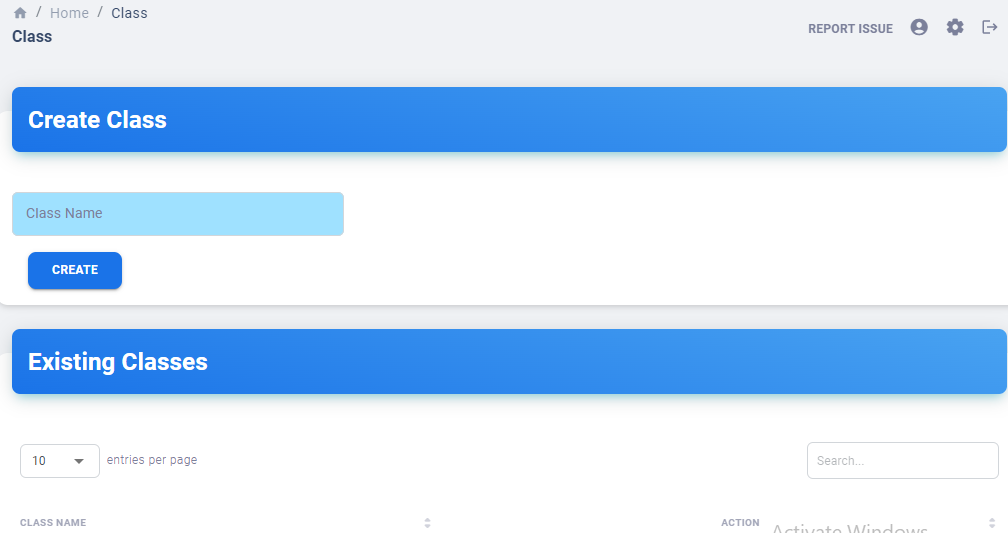
- To create a class, click on classes. You will see a window as above.
- Enter the class name and submit. The class will be created.
Add Subjects
Subject features allow the tutor to provide the students with the study resources of any particular subject. The tutor needs to enter the details on the screen, as shown below.
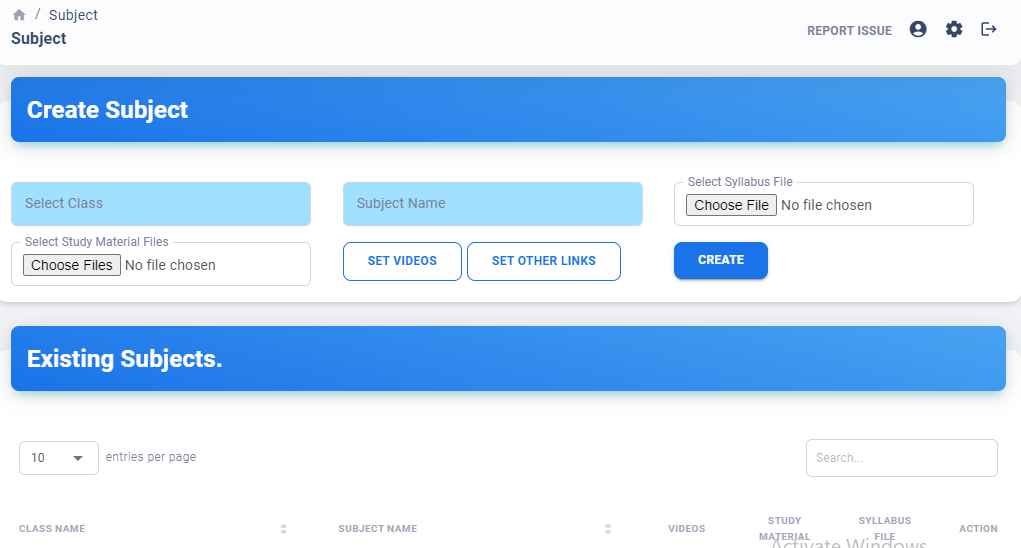
- Select the class for which you want to enter the details.
- Enter the subject name.
- For uploading the syllabus file, you need to choose the file by clicking on the choose file tab.
- To select study material, click on the study materials file. You can browse your files and select the required file to upload.
- Select set videos and set other links to enter the links to videos you want to provide.
- Click on create to create the subjects.
Conduct Tests & Share Test Results
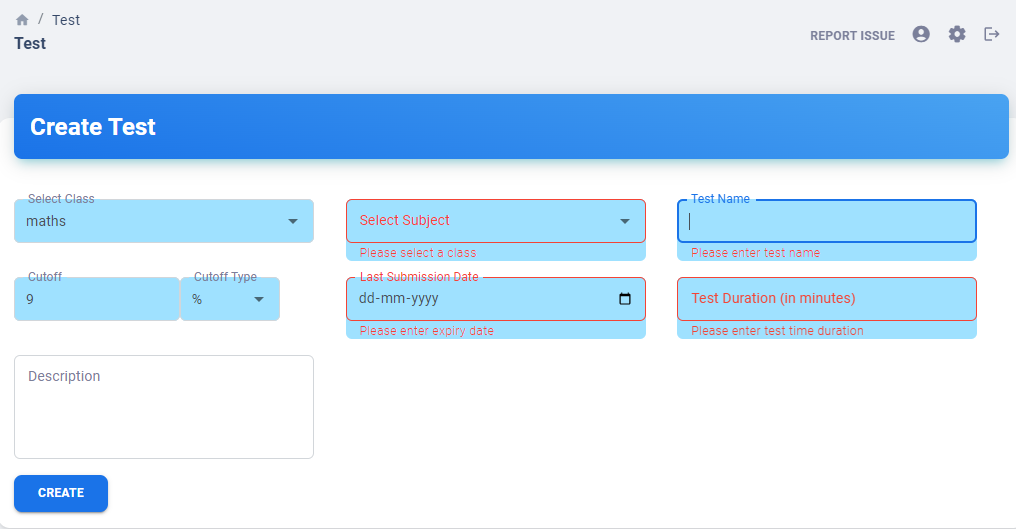
With this particular option on the dashboard, you can create tests for your students and maintain a record of the existing test.
- Click on the test tab.
- Enter the class you want to create a test for.
- Select a subject for the test.
- Enter the test name, and this can be a subject name or any specific name.
- Enter the cut-off percentage for the test in the cut-off section. You can change the % option to marks.
- Enter the decided last date of submission for the test.
- Enter the test duration that you want to allot.
- Write the description for the test.
- Once you are done with the description, click on create a tab to create the test.
- Once done, you can update the test and enter the questions.
Add Multiple Students
With the student feature, you can add a student to your portal and provide student access to them. You need to enter a few details like email id and name to create a portal for the student to access. Here, you can also keep a tally of the students. Click on students.

To create student records, follow the steps listed.
- Enter the student’s name and student email.
- Enter password. Enter age and roll no. in the fill-in tab.
- In the student access block, you will see a list of subjects.
- Select a subject from the list and click on create to create a student access portal.
Manage Multiple Tutors
Sub-tutor feature is the best solution to the tedious management task of any institution. With this feature, a person can add N number of sub-tutors, assign them subjects, create their portal, and keep a check on their actions, all in one place.
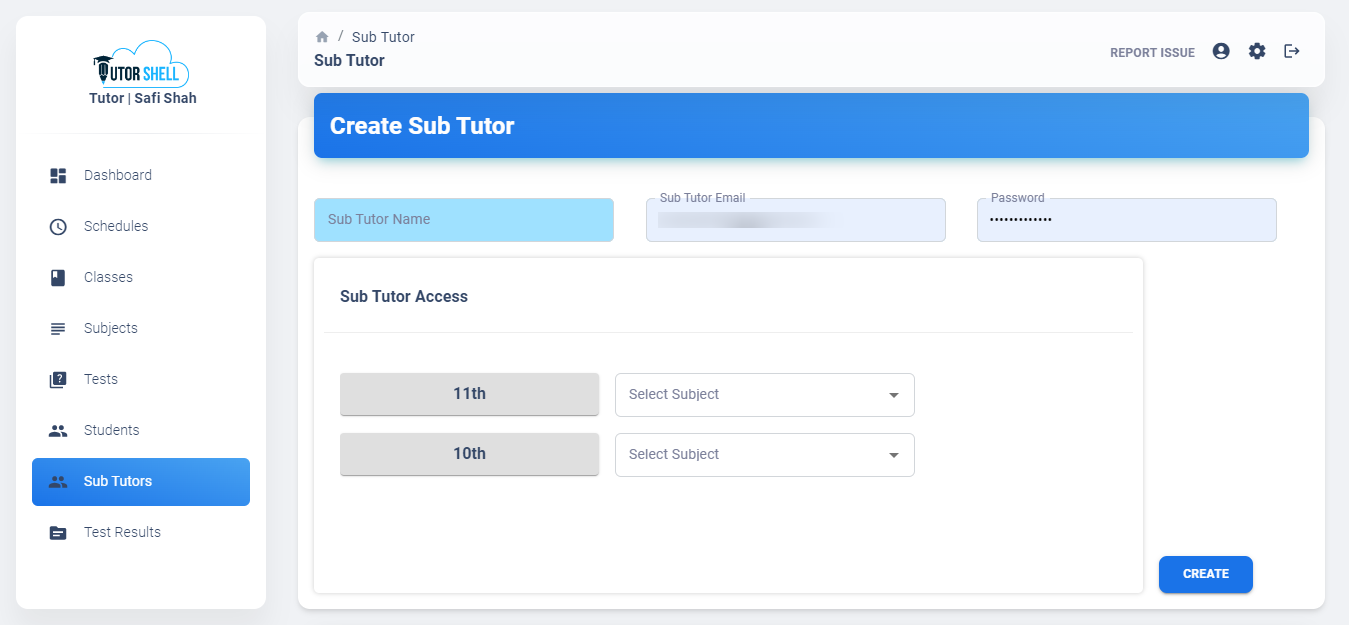
To create sub-tutors records, follow the steps listed.
- Enter the sub-tutor name and sub-tutor email.
- Enter password.
- In the sub-tutor access block, you will see a list of subjects.
- Select a subject from the list and click on create to create a sub-tutor access portal.
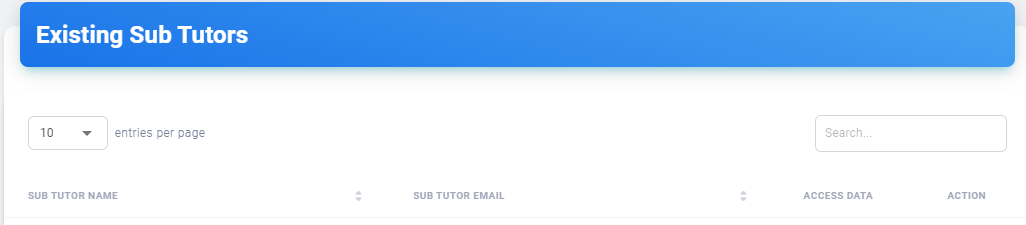
You can also see the sub-tutor records, access, and action through the tally in the same section.
In the end, everyone wants software that is simple to use and has the best features. With this step-by-step guide toTutorshell, one can easily understand the excellence of Tutorshell. Tutorshell is a very simple software to simplify the complicated work of tutors and private institutions. It has been used by many to organize their work.